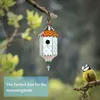
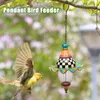
Are you a woodpecker enthusiast looking for an affordable and eco-friendly way to feed your feathered friends? Look no further than this DIY wooden bird feeder! With just a few simple materials like wood, screws, and hooks, you’ll have a new feeder in no time. Follow our step-by-step guide with accompanying pictures to make construction a breeze. Hang the feeder in an optimal location for attracting woodpeckers and other birds, and keep it well-maintained by cleaning it regularly and refilling the seeds. Not only will you be providing food for these beautiful creatures, but you’ll also have the satisfaction of knowing you made it yourself! Consider using recycled materials for an even more sustainable option.


Materials Needed
If you are a bird lover, then perhaps you have already heard about the woodpecker. These birds are known for their unique beaks and the drumming sounds they produce. If you want to attract woodpeckers to your backyard and observe them up close, then building a woodpecker bird feeder is a great idea. Here’s a step-by-step guide on how to build one.
Materials Needed:
– Wood – 1×6 board, 4 feet long
– Drill
– Screws
– Hooks
– Nails
– Hammer
– Saw
– Sandpaper
– Paint or Stain (optional)
– Roofing nails
Where to Buy Materials or Recycled Alternatives:
The materials listed above can be easily found at any hardware store. However, if you want to save money and reduce waste, you can also look for recycled materials. Check local second-hand stores or online marketplaces like Facebook Marketplace and Craigslist. You might find some wood scraps from previous projects that you can use for your bird feeder.
Step-by-Step Guide:
1. Choose a design for your bird feeder. There are many designs available online, so pick one that suits your preferences. You can choose a simple design or a more elaborate one with multiple platforms.
2. Cut the wood into pieces according to the design. Use a saw to cut the boards into the required lengths. You will need four sides, a bottom, and a roof.
3. Sand the edges of the wood to remove any rough spots. This will prevent the birds from getting splinters.
4. Assemble the sides of the bird feeder. Use screws to fasten the sides together. Make sure that the sides are flush against each other.
5. Attach the bottom of the bird feeder. Screw it in place using the same method as above.
6. Install the hooks. Screw in two hooks on opposite sides of the roof. These hooks will be used to hang the bird feeder.
7. Attach the roof to the bird feeder. Nail the roof onto the top of the bird feeder. Make sure that the roofing nails are secured properly.
8. Optional: Paint or stain the bird feeder. You can add color to the bird feeder to make it more attractive to the woodpeckers.
9. Hang the bird feeder. Find a good spot to hang the bird feeder. Make sure that it is high enough to keep away from predators but still accessible to the woodpeckers.
Construction Steps
To get started on constructing your own woodpecker bird feeder, you will need a few basic supplies including wood, screws, a drill, saw, and some type of birdseed. The wood can be any type of sturdy and weather-resistant material such as cedar, redwood, or treated pine. Once you have gathered your materials, follow these simple steps:
1. Cut the wood: Using a saw, cut the wood into the desired shapes and sizes for the bird feeder. A typical design would include a rectangular base, two side panels, a front panel with a circular feeding hole, and a roof.
2. Drill holes: Use a drill to create several small drainage holes in the bottom of the feeder to prevent moisture buildup. Also, drill a larger circular hole in the center of the front panel where the birds will access the birdseed.
3. Assemble the feeder: Begin by attaching the two side panels to the base using screws. Next, attach the front panel with the feeding hole to the sides, making sure the hole is centered. Finally, attach the roof to the top of the feeder using screws.
4. Add birdseed: Fill the feeder with the appropriate type of birdseed for woodpeckers, such as suet or nut blends.
5. Hang the feeder: Use a sturdy hook or chain to hang the feeder from a tree branch or other secure location.
By following these simple construction steps, you can create a functional and attractive woodpecker bird feeder that will provide hours of entertainment and enjoyment. Additionally, you can take pride in knowing that you have created a habitat that supports the natural environment and the native bird species in your area.
Placement and Maintenance
Placement:
When it comes to attracting woodpeckers, location is everything. Firstly, make sure to hang your feeder in an area that is visible from inside your home or any outdoor seating area. This way, you can observe the birds as they feed and enjoy their presence. Secondly, consider placing your feeder near a tree trunk or post. Woodpeckers are known for their ability to cling to surfaces, so having the feeder close to a sturdy surface will make it easier for them to access the food. Additionally, woodpeckers prefer to feed in areas with plenty of cover, so consider hanging your feeder near a bushy area or shrub.
Maintenance:
Regular maintenance is crucial to keep your woodpecker bird feeder in top condition. Here are some tips to ensure your feeder is always ready for your feathered friends:
1. Keep the feeder clean: It’s essential to clean your feeder regularly to prevent the growth of mold and bacteria. Use a brush and hot soapy water to remove any debris or leftover seeds. Rinse thoroughly and allow the feeder to dry completely before refilling it.
2. Refill frequently: Woodpeckers are known for their hearty appetites, so it’s essential to keep the feeder full of fresh seeds at all times. Check the feeder every few days and refill it as needed.
3. Use quality seeds: Not all birdseed is created equal. To attract woodpeckers, use high-quality seeds such as peanuts, sunflower seeds, and suet. These are all rich in protein and fat, which are essential nutrients for woodpeckers.
4. Protect from squirrels: Squirrels are notorious for stealing birdseed from feeders. To prevent this, consider using a squirrel-proof feeder or add a baffle to the pole supporting the feeder. This will prevent squirrels from climbing up and accessing the feeder.
In conclusion, proper placement and maintenance of your woodpecker bird feeder can make all the difference in attracting these magnificent birds to your backyard. By following these tips, you’ll be able to enjoy the beauty and charm of woodpeckers right outside your window.
FAQ
Q1. How do I attract woodpeckers to my feeder?
To attract woodpeckers to your DIY bird feeder, consider placing it in a shaded area with nearby trees or shrubs. Woodpeckers are often attracted to suet or peanut butter mixes, so try incorporating those into your feeder design. Additionally, incorporating natural materials like bark or logs can make your feeder more attractive to woodpeckers.
Q2. What materials do I need to build the DIY Woodpecker Bird Feeder?
The materials needed for this DIY project include a wooden board (sized to your preference), screws, a drill, a saw, a metal mesh, and a hinge. You may also want to purchase a hook or chain to hang the feeder from a tree or other structure.
Q3. Can I use different types of wood for the feeder?
Yes, you can use different types of wood for the feeder, but it is important to choose a sturdy, weather-resistant wood like cedar or redwood. Avoid using treated lumber or softwoods like pine, as they may not withstand outdoor elements as well.
Q4. How often should I refill the feeder?
The frequency at which you need to refill your woodpecker feeder will depend on how many birds are visiting and how much food you have placed inside. It is recommended to check and refill the feeder every 2-3 days to ensure the birds have a steady food source. If you notice that the food is not being eaten quickly, you may want to reduce the amount you put in to prevent waste and potential spoilage.

