Are you tired of spending a fortune on cat furniture that doesn’t quite fit your feline friend’s needs? Why not try DIY-ing it? Not only will you save money, but you can also customize the design to cater to your cat’s specific needs and preferences. To get started, all you need are some essential materials like wood, screws, drills, saws, and sandpaper. For beginners, simple projects like scratch posts and cat trees are easy to make with detailed instructions and measurements provided. More experienced builders can try multi-level cat towers or even custom-built cat beds with built-in storage. Want to add some personal touches to your cat furniture? Get creative with painted designs or attaching toys and accessories. With these tips, you’ll be well on your way to creating the perfect furniture for your furry friend.


Introduction: The Benefits of DIY Cat Furniture
1. Materials: Choose the Right Wood for Your Cat
– Discuss the different types of wood that are suitable for cat furniture, such as solid wood and plywood.
– Explain the importance of selecting non-toxic materials to ensure the safety of your cat.
2. Design: Make Your Furniture Cat-Friendly
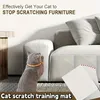
– Discuss the elements that make a piece of furniture cat-friendly, such as scratching posts and hiding spots.
– Provide examples of different designs that cater to cats’ needs, such as shelves and climbing trees.
3. DIY vs Store-Bought: Benefits of Creating Your Own Furniture
– Compare the benefits of creating your own cat furniture versus purchasing pre-made pieces from a store.
– Highlight the cost savings and customization options involved in making your own furniture.
4. Assembly: Tips for Building Your Own Cat Furniture
– Provide step-by-step instructions for building basic cat furniture pieces, such as scratching posts and litter box enclosures.
– Offer tips for ensuring the sturdiness and stability of your furniture. The Advantages of DIY Cat Furniture
– Summarize the benefits of creating customized furniture for your cat, including cost savings and the ability to tailor designs to your cat’s specific needs.
– Encourage readers to try building their own cat furniture to provide their furry friends with the ultimate play and relaxation space.
As a cat owner looking for ways to enhance your fur baby’s living space, DIY cat furniture should be at the top of your list. Not only does it offer numerous benefits, but it also allows you to tailor designs specifically to your pet’s needs.
One of the key advantages of building your own cat furniture is the cost savings compared to pre-made pieces from a store. By utilizing readily available materials and tools, you can create stylish and functional pieces without breaking the bank.
When choosing the materials for your cat furniture, it is important to select non-toxic materials to ensure the safety of your cat. Solid wood and plywood are excellent choices for building sturdy and durable structures that can withstand the wear and tear of your cat’s claws and paws.
Design plays a crucial role in creating cat-friendly furniture. It is essential to include elements like scratching posts, hiding spots, and climbing trees to keep your cat engaged and entertained. Customizing the design to suit your cat’s needs and preferences will ensure they feel comfortable and happy in their new furniture.
While purchasing pre-made furniture may seem like an easy solution, there is limited scope for customization and personalization. With DIY cat furniture, you have complete control over the design, which allows you to cater to your cat’s specific needs and preferences.
Building your own cat furniture may seem daunting, but with the right tools and instructions, it can be a fun and rewarding project. Providing step-by-step instructions for building basic cat furniture pieces such as scratching posts and litter box enclosures ensures that even beginners can create high-quality furniture that is both stable and safe.
Materials and Tools You’ll Need
Materials:
– Wood: Choosing the right type of wood is crucial for any woodworking project. For cat furniture, it is important to use sturdy and durable wood that can withstand the weight and activity of your furry friend. Pine and plywood are popular choices due to their affordability and availability. Oak and maple are also excellent options but are more expensive.
– Screws: You’ll need screws of various sizes depending on the project you’re working on. Choose screws that are long enough to provide sufficient support and hold the pieces together.
– Wood glue: Using wood glue in addition to screws will add extra strength and durability to your furniture. Be sure to choose a strong and fast-drying wood glue.
– Carpeting or sisal rope: Adding carpeting or sisal rope to your cat furniture can provide a comfortable and scratchable surface for your cat to climb and play on.
– Paint or stain: Adding a coat of paint or stain to your cat furniture can make it look more attractive and protect the wood from scratches and dents.
Tools:
– Drill: A drill is an essential tool for woodworking. It allows you to make holes for screws and attach pieces of wood together.
– Saw: Depending on the project, you may need a saw to cut the wood into the desired shape and size. A jigsaw or circular saw is ideal for cutting straight lines, while a coping saw is perfect for making curved cuts.
– Sandpaper: Sandpaper is necessary to smooth out rough edges and surfaces after cutting and drilling.
– Measuring tape: Accurate measurements are key to successful woodworking. A measuring tape will help you ensure that all pieces of wood are cut to the correct length and width.
– Square: A square is a useful tool for ensuring that corners are at a 90-degree angle and that your furniture is level.
Step-by-Step Instructions for Simple Projects
Scratching Post:
Materials Needed:
– 1-2 wooden posts (3 feet in height, 4 inches in diameter)
– Sisal rope
– Wood glue
– Carpet scrap
– Circular base made of plywood
– Screws
Instructions:
1. Start by attaching the wooden posts to the circular base using screws to ensure stability.
2. Apply wood glue to the entire surface of the wooden posts and begin wrapping them with sisal rope. This will create a durable and attractive scratching surface for your cat.
3. Once the entire length of the posts is covered with sisal rope, secure the end with wood glue.
4. Attach a carpet scrap to the circular base, providing a comfortable surface for your cat to lay on.
Cat Tree:
Materials Needed:
– 2-3 wooden posts (various heights)
– Plywood sheets
– Sisal rope
– Wood glue
– Carpet remnants
– Circular base made of plywood
– Nails or screws
Instructions:
1. Begin by attaching the wooden posts to the circular base using nails or screws, ensuring that they are evenly spaced apart to create a stable foundation.
2. Cut the plywood sheets into various sizes to create platforms for your cat to climb and lounge on. Secure these platforms to the wooden posts using nails or screws.
3. Apply wood glue to the wooden posts and wrap them with sisal rope to create scratching surfaces.
4. Cover the platforms with carpet remnants to provide a soft and cozy resting area for your cat.
Tips for Beginners:
– Take accurate measurements and double-check them before cutting any materials to ensure precision.
– Use a level to ensure that all components are straight and properly aligned.
– Consider adding additional features such as hanging toys or a cozy hideaway to make the cat furniture even more appealing to your cat.
Advanced Projects for Experienced Builders
Multi-Level Cat Tower:
A multi-level cat tower is a great project for experienced builders who want to create a stylish and functional piece of furniture for their feline friends. This project requires a range of woodworking skills, from cutting and sanding to drilling and assembly.
To begin, gather your materials and tools, including plywood sheets, wooden dowels, screws, a drill, a jigsaw, and sandpaper. You may also want to consider adding carpet or sisal rope to the platforms for added comfort and scratching opportunities.
To build the tower, start by cutting out the base and platform pieces using a jigsaw. Then, drill holes in both the base and platforms where the wooden dowels will go. Sand all of the pieces until they are smooth, and then assemble them together using screws and the dowels.
Next, cut out any additional features you want to add to the tower, such as a cat condo or hammock. Attach these to the platform using screws and brackets. Finally, add carpet or sisal rope to the platforms to make them extra cozy and appealing to your cat.
Custom-Built Cat Bed with Built-In Storage:
For those who want to combine functionality and style, a custom-built cat bed with built-in storage can be a great project. This project requires a range of woodworking skills, from measuring and cutting to sanding and staining.
To begin, gather your materials and tools, including plywood sheets, a saw, screws, wood glue, a drill, sandpaper, and a stain or paint of your choice. You may also want to consider adding a cushion or blanket to the bed for added comfort.
To build the cat bed, start by measuring and cutting the plywood sheets to the desired size. Sand all of the pieces until they are smooth, and then assemble them together using screws and wood glue.
Next, cut out a section of the bed frame to create a storage compartment. Attach a hinged door to the compartment using screws. Finally, stain or paint the bed to match your decor, and add a cushion or blanket for your cat’s comfort.
Tips for Customizing Your Cat Furniture
One way to customize your cat furniture is by adding a personal touch through painted designs. A simple addition like painting your cat’s name or favorite paw print on their bed or tree can make it look more personalized and special. For the more artistic owners, you could also try painting custom designs and patterns. This is a great way to showcase your artistic skills while providing your cat with a one-of-a-kind piece that’s personalized just for them.
Another idea to consider is attaching toys and accessories to your cat furniture. This customization not only provides entertainment for your pet but also adds functionality to the piece. For example, you could attach a feather wand or hanging ball to a scratching post or cat tower. This will keep your cat engaged and entertained while keeping their claws in check.
When customizing your cat furniture, it’s important to consider your cat’s specific breed and personality. For example, if you have a high-energy cat breed like a Bengal or Siamese, they may benefit from additions like climbing walls or exercise wheels. If you have a senior cat or a cat with mobility issues, you may want to consider adding ramps or steps to help them access higher areas.
Finally, don’t be afraid to get creative with your cat furniture customizations. The sky’s the limit when it comes to personalizing your pet’s space. You could add custom-made cushions or blankets, attach cat-friendly plants or even create a themed cat tree based on your pet’s favorite TV show or movie. Whatever you decide to do, make sure it’s safe for your cat and doesn’t compromise the functionality of the piece.
In conclusion, customizing your cat furniture is a great way to add personality, functionality, and style to your home while providing your furry friend with a comfortable and entertaining space. By incorporating personalized touchpoints, you’ll create a piece that perfectly suits both your cat’s needs and your home decor. With these tips, you can unleash your creativity and transform your cat’s space into something truly unique and special.
FAQ
Q1. What are the benefits of building DIY wood cat furniture?
DIY wood cat furniture allows cat owners to create custom furniture that meets their cat’s specific needs and preferences. It is also a cost-effective alternative to buying pre-made cat furniture. Additionally, building your own furniture can be a fun and rewarding project for both you and your cat.
Q2. What tools do I need to build DIY wood cat furniture?
Some basic tools required to build DIY wood cat furniture include a saw, drill, hammer, screws, nails, and sandpaper. Additional tools may vary depending on the complexity of the project. It is important to have a safe working environment and to use appropriate safety gear, such as gloves and eye protection.
Q3. Can I customize my DIY wood cat furniture to fit my cat’s specific needs?
Yes, one of the benefits of building DIY wood cat furniture is that it can be customized to fit your cat’s specific needs. For example, if your cat enjoys climbing, you can build a tall cat tree with multiple levels and platforms. If your cat prefers cozy spaces, you can build a cat bed or a sheltered hiding spot.
Q4. Are there any safety concerns I should consider when building DIY wood cat furniture?
Yes, it is important to ensure that the furniture is stable and secure to prevent it from tipping over or collapsing. Sharp edges or corners should be sanded down to prevent injuries to your cat. Additionally, it is important to use non-toxic materials and finishes to avoid any harmful chemicals that could harm your cat.

