If you’re a wooden bird feeder enthusiast, our article provides a comprehensive guide to building and maintaining your own rustic bird feeder. We list all the materials needed with suggestions for where to purchase them, followed by step-by-step instructions and helpful tips along the way. We also offer ideas for decorating the bird feeder to fit your personal style or garden decor, including non-toxic paint options. Additionally, we provide maintenance and care tips to ensure your bird feeder lasts. Finally, we emphasize the satisfaction of building your own feeder and encourage readers to share their DIY projects and experiences. With this guide, you can create a beautiful bird feeder to attract feathered friends to your garden.


Materials Needed
Materials Needed:
1. Wood: The most important material for building a bird feeder is wood. You can use any type of wood, but cedar and pine are the best choices as they are weather-resistant and durable. You will need plank boards, about 1 inch thick, to construct the bird feeder.
2. Screws and Nails: You will require screws and nails to hold the wooden pieces together. Use galvanized screws as they are resistant to rust and corrosion.
3. Saw: A saw is essential for cutting the wooden pieces to the desired size and shape. You can use either a circular saw or a hand saw.
4. Measuring Tape: To ensure precision in your measurements, you will need a measuring tape.
5. Drill: A drill is required to make holes in the wooden pieces for screws and nails.
6. Birdseed: Finally, you will need birdseed to fill your bird feeder once it’s built.
Where to Buy Materials:
1. Local Home Improvement Stores: Visit your local home improvement stores such as Home Depot or Lowe’s to purchase the wood, screws, nails, and drill.
2. Online Retailers: Many online retailers like Amazon, Etsy or Wayfair offer a wide range of bird feeder kits with everything you need to get started.
3. Local Pet and Garden Centers: Pet and garden centers often sell bird feeders and birdseed, which can help with the sourcing of your materials.
Step-by-Step Instructions
Step 1: Gather Materials
The first step in building a wooden bird feeder is to gather all the necessary materials. You will need:
– Cedar or redwood boards (cut to size)
– Screws
– Waterproof wood glue
– Plexiglas or screen mesh
– Hinges
– Hooks
– Rope or chains
– Birdseed
Step 2: Cut and Sand Your Boards
Once you have gathered all of your materials, it’s time to cut and sand your boards to the appropriate size. You can customize the size of your bird feeder based on your needs and preferences. Make sure to sand the edges and surfaces of the boards to prevent splinters and ensure a smooth finish.
Step 3: Assemble the Base
Next, assemble the base of your bird feeder by attaching the four sides together using screws and waterproof wood glue. Make sure that each side is flush with one another and that the corners are square. Allow the glue to dry completely before moving on to the next step.
Step 4: Add the Roof
Once the base is complete, it’s time to add the roof. Cut two pieces of board at an angle and attach them to the top of the base using hinges. This will allow you to easily refill the bird feeder with seed as needed. You can also attach hooks to the roof to hang the bird feeder from a tree or other structure.
Step 5: Install the Plexiglas or Screen
In order to keep the birdseed dry and protected from the elements, you will need to install plexiglass or screen mesh over the feeding area. Cut a piece of plexiglass or screen to the appropriate size and attach it to the inside of the bird feeder using screws.
Step 6: Attach Rope or Chains
Finally, attach rope or chains to the roof of the bird feeder so that it can be hung from a tree or other structure. Make sure that the rope or chains are securely attached and can support the weight of the bird feeder when filled with seed.
Helpful Tips:
– Use a waterproof wood glue to ensure that your bird feeder will hold up in all weather conditions.
– Consider adding decorative touches such as paint or stenciling to make your bird feeder unique.
– Hang your bird feeder in a quiet area away from predators such as cats and squirrels.
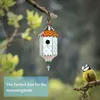
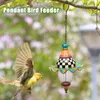
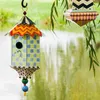
Decorating Your Bird Feeder
– Emphasize the importance of maintaining a clean and safe environment for birds while decorating
Bird feeders are a great way to attract different species of birds into your garden or backyard. They not only provide a source of food but also add a touch of beauty to your outdoor space. However, plain bird feeders can be a bit boring and may not match your personal style or garden decor. That’s where decorating your bird feeder comes in – it’s a fun and creative way to personalize your feeder while making it look more attractive.
One of the best ways to decorate your bird feeder is by painting or staining it in different colors. If you’re using paint, make sure to choose a non-toxic brand that won’t harm the birds. You can also opt for natural stains such as coffee or tea to give your feeder a rustic look. Before applying any paint or stain, ensure that your bird feeder is clean and dry so that the colors adhere well.
Another great idea for decorating your bird feeder is to use decoupage. This involves cutting out pictures or patterns from magazines, newspapers or even wrapping paper and gluing them onto the feeder. It’s a cheap and easy way to add a pop of color and design to your feeder. You can even get your kids involved and make it a fun family activity.
Adding accessories such as ribbons, beads or even fairy lights is another way to make your bird feeder stand out. However, it’s important to remember that safety should always come first. Make sure that any accessories you add do not pose a risk to the birds or interfere with their feeding. For example, ribbons should be tied loosely around the feeder rather than tightly bound, which could cause birds to become entangled.
When decorating your bird feeder, it’s crucial to maintain a clean and safe environment for the birds. Avoid using any toxic materials or chemicals that may contaminate the birdseed or harm the birds. Also, make sure to regularly clean your feeder to prevent the buildup of mold, bacteria, and other harmful substances that could make the birds sick.
Maintenance and Care
If you are a wooden bird feeder enthusiast, you know how important it is to ensure that your feeder is well-maintained and taken care of. Proper maintenance and care not only keep your feathered friends happy and healthy but also prolong the lifespan of your feeder. In this article, we will provide tips on how to maintain and care for your bird feeder.
Firstly, it is essential to clean your wooden bird feeder regularly. The frequency of cleaning depends on several factors such as weather conditions and the number of birds that visit your feeder. However, it is advisable to clean your feeder at least once every two weeks or whenever you notice any mold, mildew, or debris buildup. Use a soft-bristled brush or cloth and warm, soapy water to scrub off the dirt and grime from all the surfaces of your feeder. If there are any tough stains, use vinegar or baking soda to help remove them. Rinse off the soap thoroughly and let the feeder dry completely before refilling it with seeds.
Apart from cleaning, protecting your wooden bird feeder from the elements is also crucial. Rain, snow, and direct sunlight can damage the wood, making it prone to rot, warping, and cracking. To prevent this, you can apply a protective coating of varnish or paint to the feeder. However, make sure to use non-toxic, bird-friendly products that do not contain harmful chemicals. Alternatively, you can place your feeder in a sheltered area, preferably under a tree or an awning, to shield it from the weather.
In conclusion, taking care of your wooden bird feeder is crucial for both the birds and the feeder’s longevity. By following these simple tips, you can ensure that your feeder remains clean, protected, and functional for a long time. As a bonus, building your own bird feeder can be a rewarding experience that brings joy and satisfaction. We encourage our readers to share their DIY bird feeding projects and experiences, and enjoy the wonders of nature in their own backyard.
FAQ
Q: What materials do I need to build a rustic wooden bird feeder?
A: You will need the following materials:
– Cedar fence pickets
– Wood glue
– Nails
– Saw
– Sandpaper
– Drill
– Hole saw drill bit
– Rope or chain for hanging
Q: Do I need any prior woodworking experience to build a bird feeder?
A: No, this DIY guide is designed for beginners and requires minimal woodworking skills. However, it’s important to follow safety guidelines when using power tools.
Q: How long does it take to build a bird feeder?
A: The time it takes to complete this project depends on your level of experience, but it typically takes around 2-3 hours.
Q: Can I customize the design of my bird feeder?
A: Yes, this DIY guide provides a basic design for a rustic wooden bird feeder, but you can personalize it by adding decorative elements or changing the dimensions to fit your needs.
